

Well another month has flown by. I am on holiday in Scotland as I write this. After a couple of weeks with glorious weather we are getting a good soaking now! On the plus side it keeps the midges at bay!
I have had so much fun crafting with the new products and getting some classes organised, I have a new Coffee and Card venue coming up and lots of products to add to my retired stock shop on my website. I will be having a sale of that stock to coincide with my birthday at the end of the month.
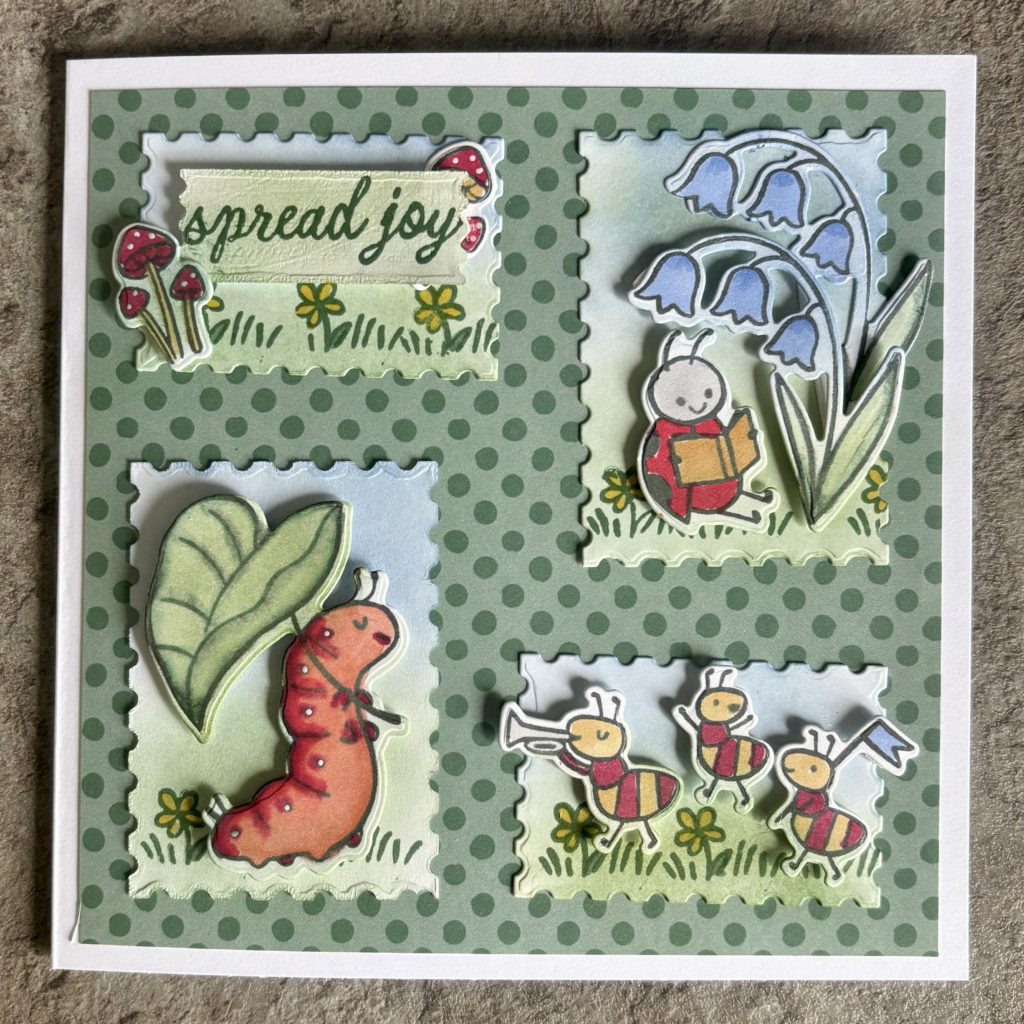
This month’s blog card theme is “For Kids”. I was delighted to have another chance to get one of my favourite bundles, Sweet Bugs, out again. I wanted to use the new In Colour collection too. It is inspired by a frame that the lovely Stacey Marsh made. I am experimenting with 6×6” cards. I cut the bases from 12×12” Basic White or Whisper White card and then buy envelopes.

The card was mainly about using inks and colouring techniques so was a great card to make with my favourite music on in the background.
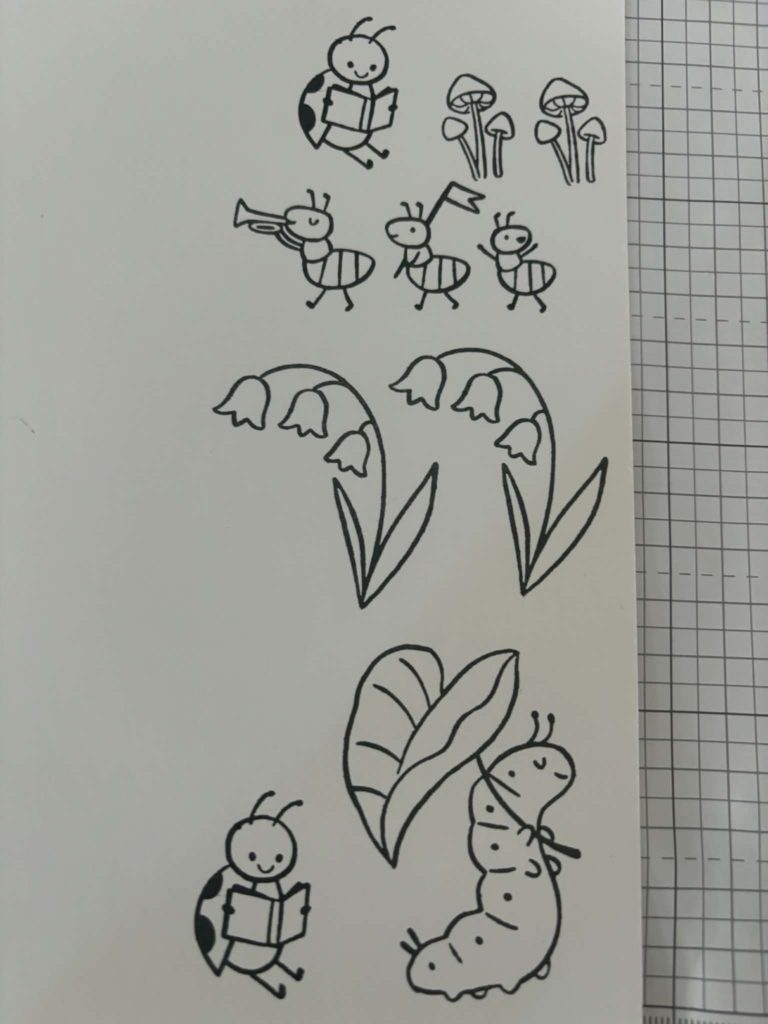
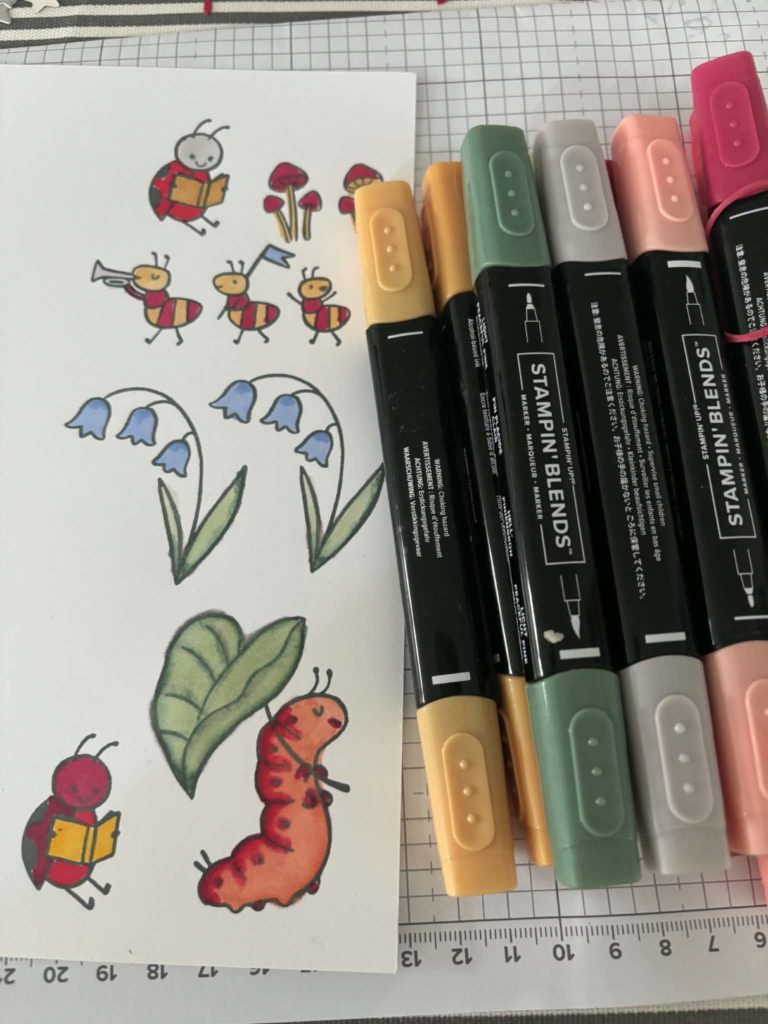
I started by stamping the bugs etc onto Basic White card and then coloured them with the new In Colour Stampin’ Blends. I also used Real Red.
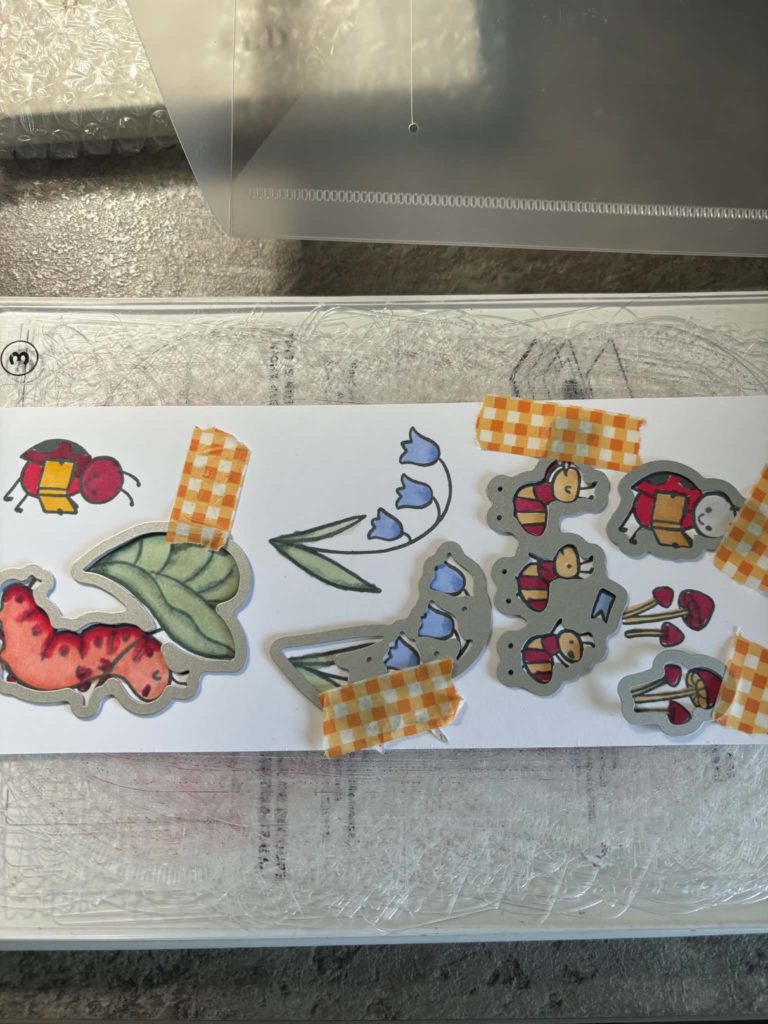
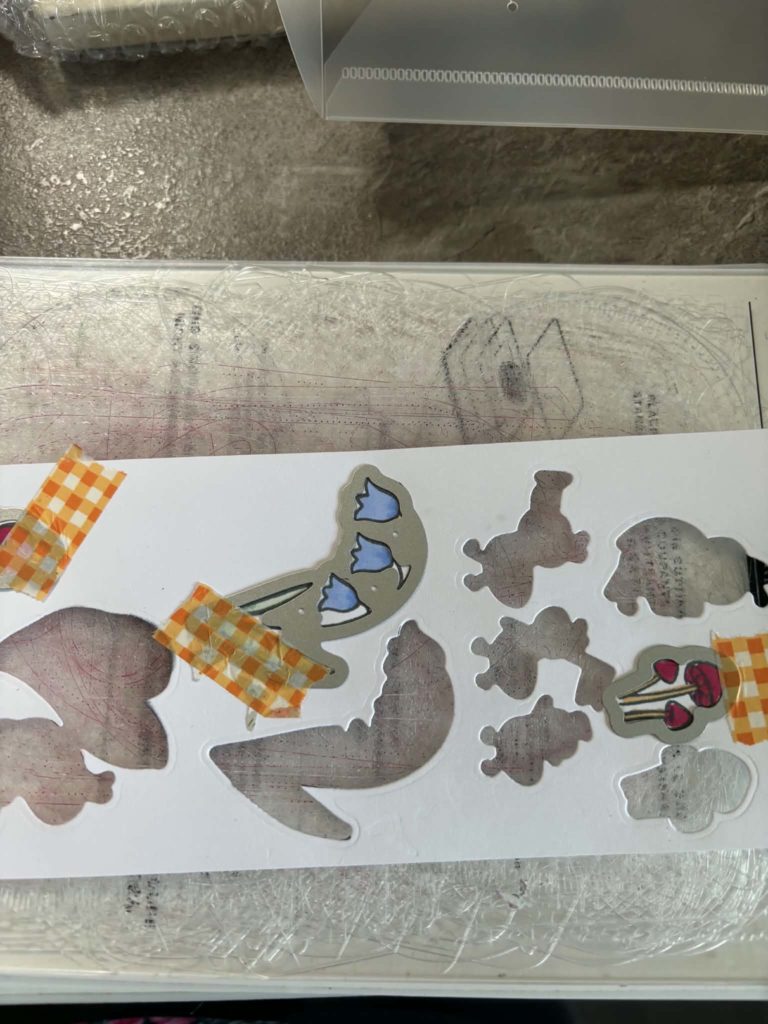
Once coloured, I die cut them using the Cut and Emboss machine. The stamps are small so either the full size or smaller machine will work. You will see that I used washi tape to hold the dies in place during the process. I make sure the tape isn’t too strongly adhered by dabbing it onto my clothing before sticking to the card. It picks up dust/fibres so it doesn’t pull the top layer off the die cut piece.
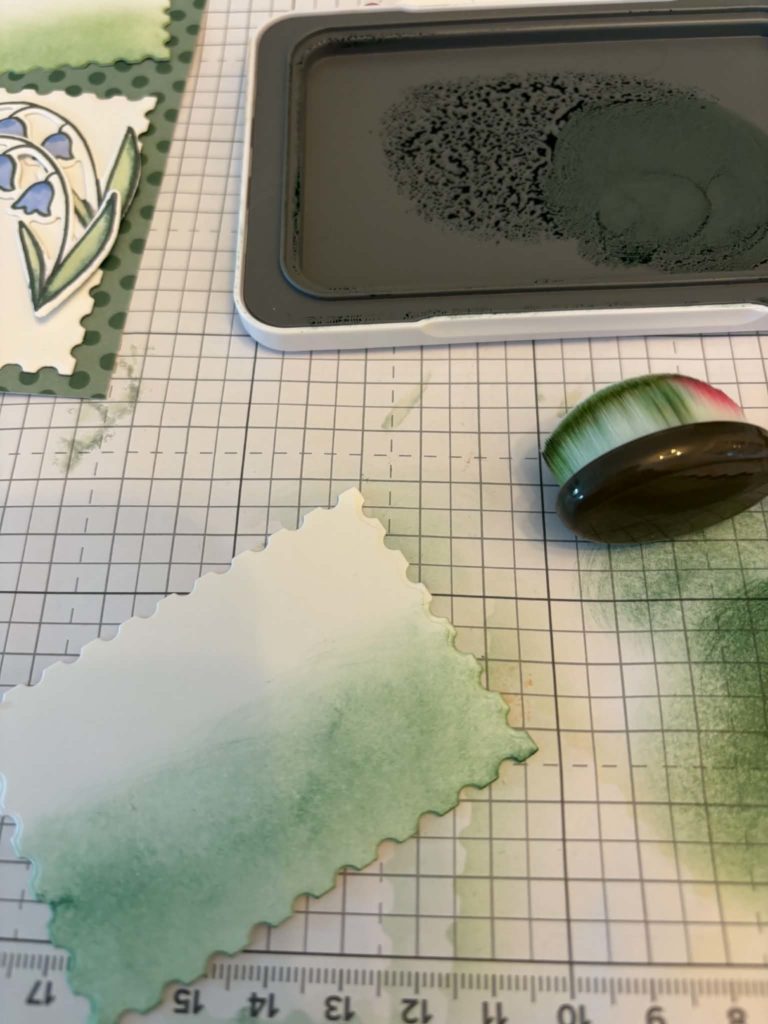
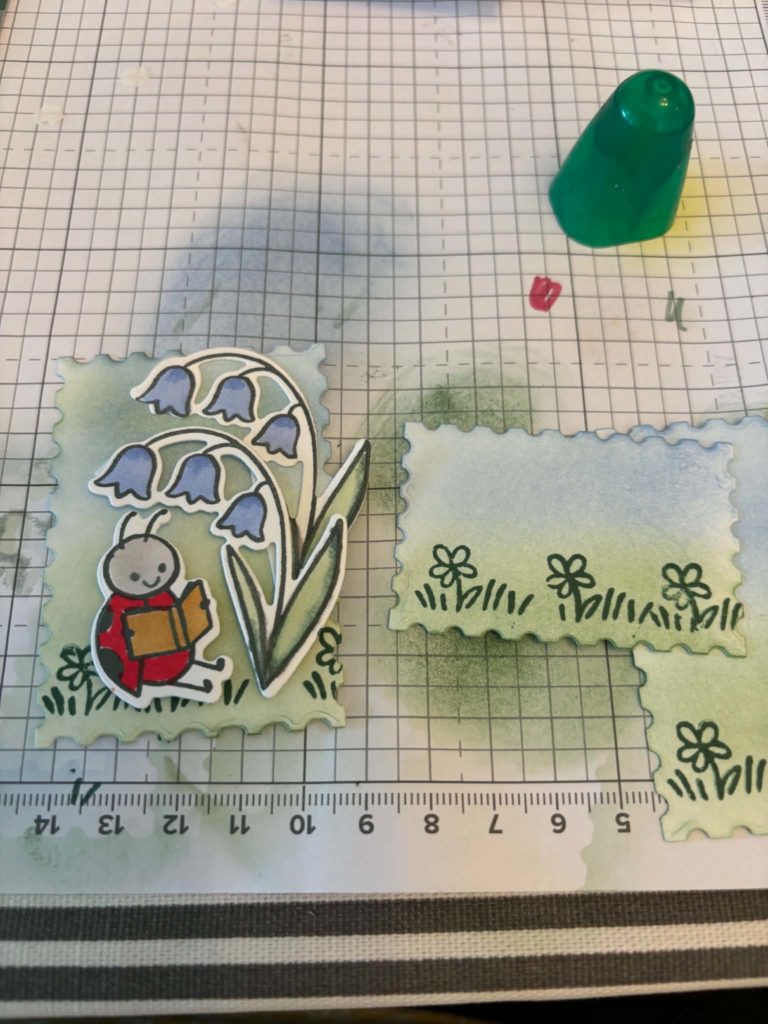
Die cut 2 large and 2 smaller rectangles from the Perennial Postage dies. The larger ones will be “ landscape” orientation and the smaller ones “portrait”. Use the little grass and flower stamp to stamp detail on the bottom of the rectangles. Use a light brushing of Peaceful Pine and Hydrangea Hue ink and Blending Brushes to give a ground and sky effect onto the rectangles.

Starting with the bluebells, attach the first one flat with multi purpose adhesive, the second raised on Dimensionals. Add the reading ladybird with dimensionals. I stuck one of the little toadstool die cuts flat before adding the sentiment. I used a tiny piece of dimensional and some multi purpose adhesive to secure the other die cuts. Did you notice the little white spots? They were done with the White Gel Pens. The other bugs were fixed with Dimensionals – the mini ones are best for this project.
To assemble the card, cut a 12×12” (30x30cm) piece of card in half and score at 6” (15 cm). Fold on score line and rub bone folder up and down along the fold to “burnish” the folds.
Cut a piece of Designer Series Paper to 5 1/2” x 5 1/2” (14.5 x 14.5cm) and stick to the card front. Arrange the rectangles onto the card front. I stuck them flat in case the card needed to be posted but you could use Dimensionals.
I put a strip of the DSP down the outside edge on the inside of the card.
Here is the finished card.
![Sweet Bugs Bundle (English) [ 167002 ]](https://assets1.tamsnetwork.com/images/EC042017NF/167002s.jpg "Sweet Bugs Bundle (English) [ 167002 ]")
![Golden Glow Stampin’ Blends Combo Pack [ 167682 ]](https://assets1.tamsnetwork.com/images/EC042017NF/167682s.jpg "Golden Glow Stampin’ Blends Combo Pack [ 167682 ]")
![Crisp Cantaloupe Stampin’ Blends Combo Pack [ 167669 ]](https://assets1.tamsnetwork.com/images/EC042017NF/167669s.jpg "Crisp Cantaloupe Stampin’ Blends Combo Pack [ 167669 ]")
![Peaceful Pine Stampin’ Blends Combo Pack [ 167668 ]](https://assets1.tamsnetwork.com/images/EC042017NF/167668s.jpg "Peaceful Pine Stampin’ Blends Combo Pack [ 167668 ]")
![Barely Blush Stampin’ Blends Combo Pack [ 167667 ]](https://assets1.tamsnetwork.com/images/EC042017NF/167667s.jpg "Barely Blush Stampin’ Blends Combo Pack [ 167667 ]")
![Hydrangea Hue Stampin’ Blends Combo Pack [ 167666 ]](https://assets1.tamsnetwork.com/images/EC042017NF/167666s.jpg "Hydrangea Hue Stampin’ Blends Combo Pack [ 167666 ]")
![Real Red Combo Pack Stampin' Blends [ 147935 ] (Retired)](https://assets1.tamsnetwork.com/images/EC042017NF/147935s.jpg "Real Red Combo Pack Stampin' Blends [ 147935 ] (Retired)")
![2026–2028 In Color™ Classic Stampin' Pads [ 167675 ]](https://assets1.tamsnetwork.com/images/EC042017NF/167675s.jpg "2026–2028 In Color™ Classic Stampin' Pads [ 167675 ]")
![White Gel Pens [ 166642 ]](https://assets1.tamsnetwork.com/images/EC042017NF/166642s.jpg "White Gel Pens [ 166642 ]")
![White Willow 12" X 12" (30.5 X 30.5 Cm) Cardstock [ 166703 ]](https://assets1.tamsnetwork.com/images/EC042017NF/166703s.jpg "White Willow 12\" X 12\" (30.5 X 30.5 Cm) Cardstock [ 166703 ]")
![Multipurpose Liquid Glue [ 154974 ]](https://assets1.tamsnetwork.com/images/EC042017NF/154974s.jpg "Multipurpose Liquid Glue [ 154974 ]")
![Mini Stampin' Dimensionals [ 144108 ]](https://assets1.tamsnetwork.com/images/EC042017NF/144108s.jpg "Mini Stampin' Dimensionals [ 144108 ]")
![Small Blending Brushes [ 160518 ]](https://assets1.tamsnetwork.com/images/EC042017NF/160518s.jpg "Small Blending Brushes [ 160518 ]")
![Peaceful Pine Classic Stampin Pad [ 167679 ]](https://assets1.tamsnetwork.com/images/EC042017NF/167679s.jpg "Peaceful Pine Classic Stampin Pad [ 167679 ]")
![Hydrangea Hue Classic Stampin' Ink Refill [ 167672 ]](https://assets1.tamsnetwork.com/images/EC042017NF/167672s.jpg "Hydrangea Hue Classic Stampin' Ink Refill [ 167672 ]")


Love you bug card! Great minds think alike!
Lovely card – a labour of love!
Fabulous card! Love the bugs x