

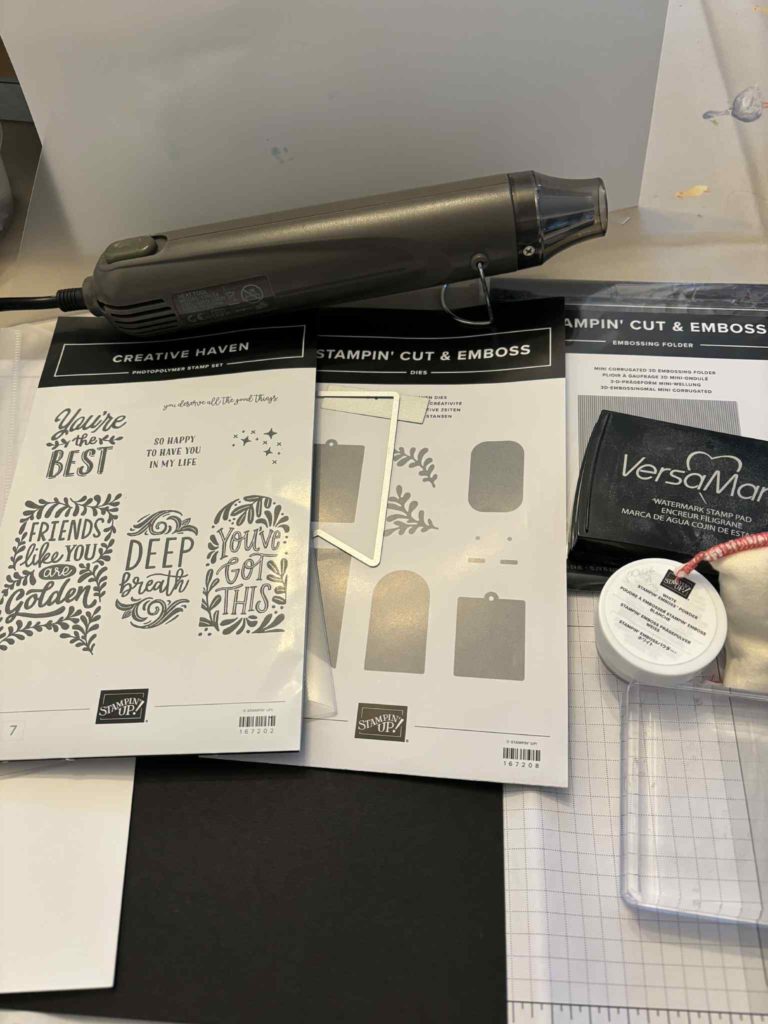
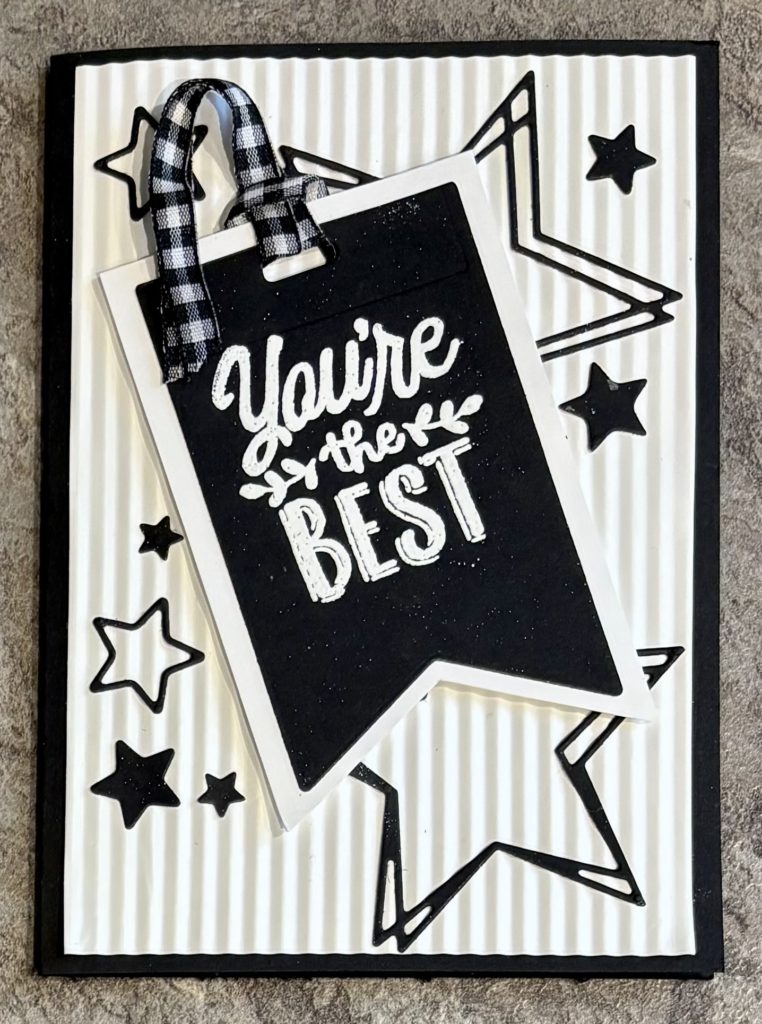
The theme for this month’s blog hop is “Black and White” I knew exactly where I was going with it. White heat embossed onto black ! I wanted to use the Creative Haven stamp set and dies but I also wanted stars. I went back to the Swirled Designs dies that I have been using recently.
I used a black card base (21cm x 14.8cm, scored at 10.5cm), white mat layer for front and also for inside (14.3cm x 10cm) white card (9.5cm x 6cm) and scraps for die cutting. The ink was Secret Sea and Versamark. I used 2 of my absolute favourite retired products – the black and white ribbon and the corrugated embossing folder. I will suggest alternatives below.
First of all get everything together.
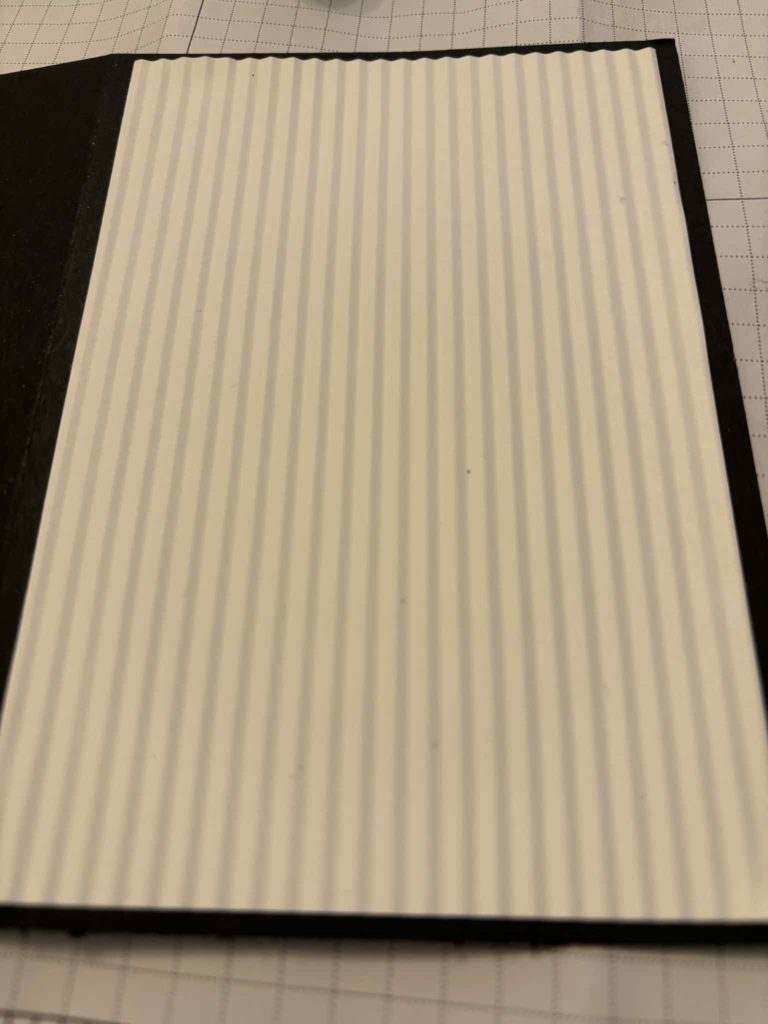
Prepare your card base, emboss your white mat layer using the Stampin’ Cut & Embossed machine and your embossing folder. Use multi purpose adhesive to stick to card base.

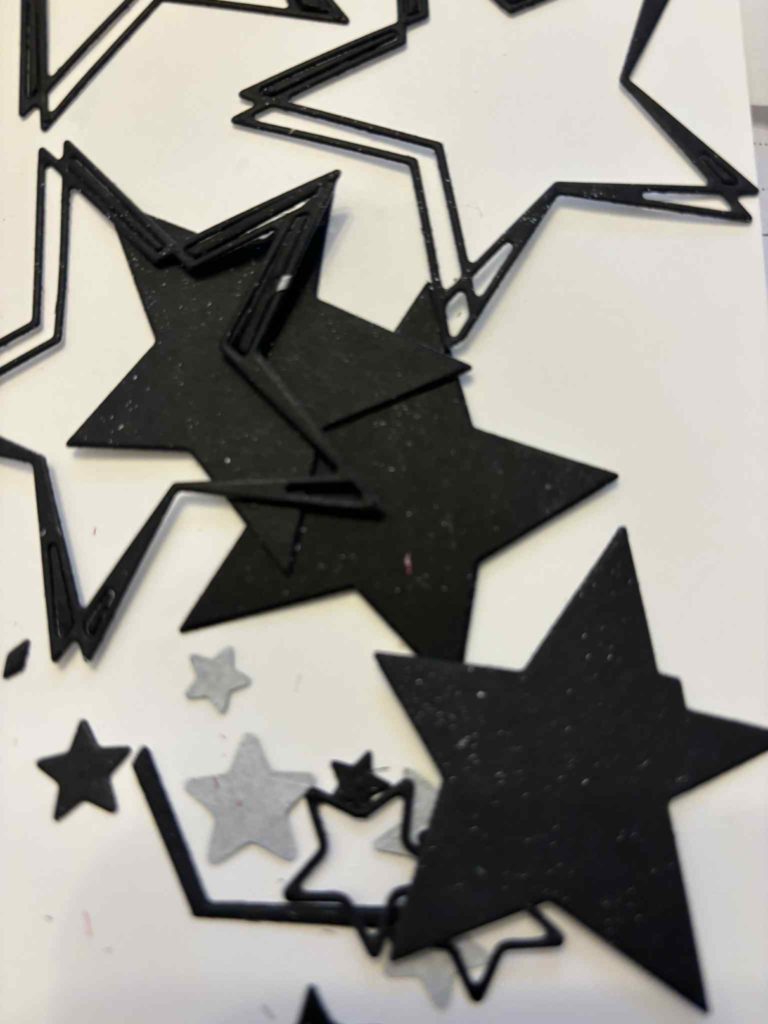
Attach adhesive sheet to reverse of black card that you will be using for the die cutting stars. Cut a selection of large and small stars using the Swirled Designs dies.
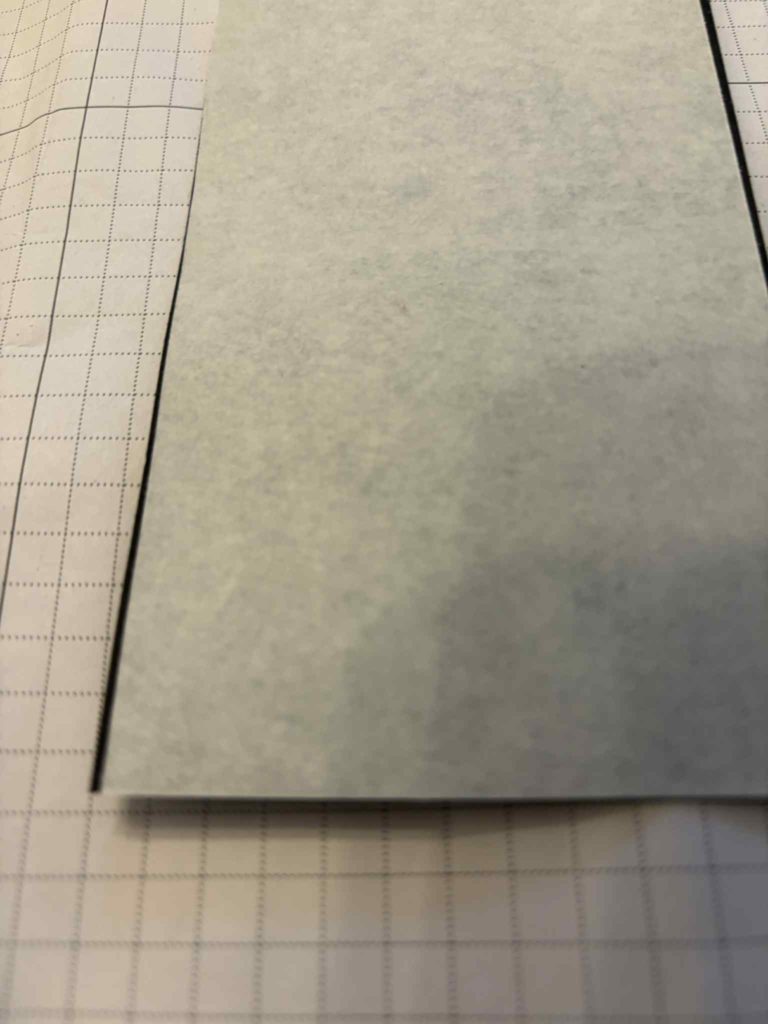
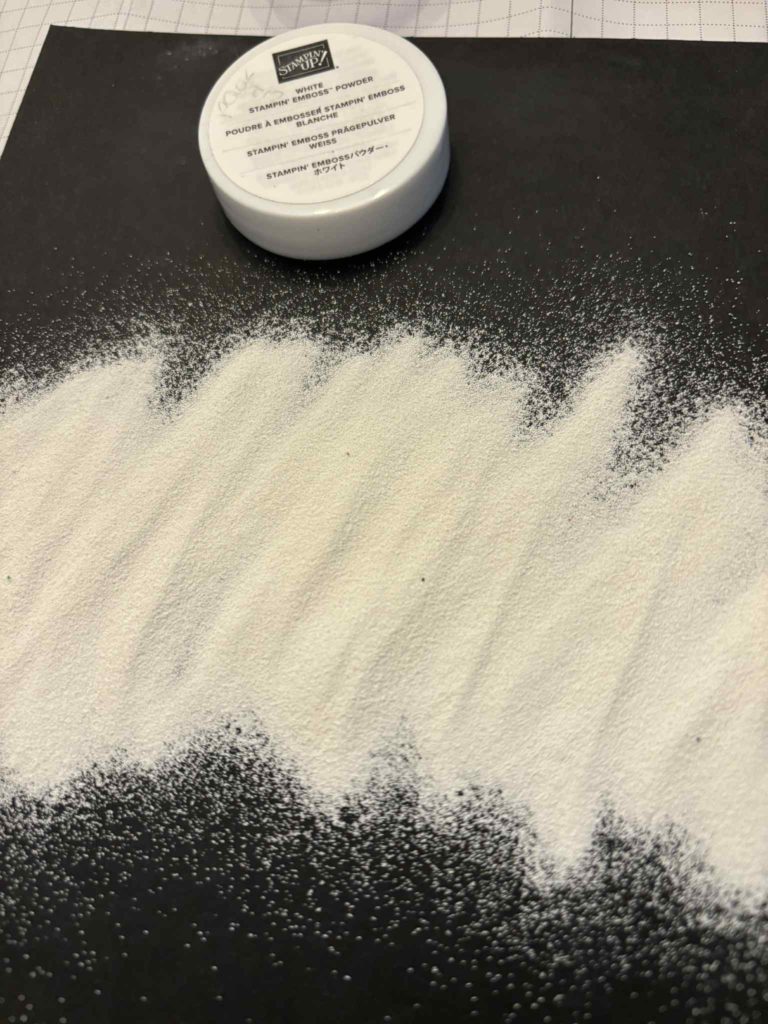
Prepare your black card for the embossed sentiments. Rub over the upper surface with the anti static pad from the Heat Embossing Tool kit. Stamp the sentiment using Versamark. Sprinkle the white embossing powder all over the inked area and tip remaining powder back into the pot. Make sure any out of place powder is removed or it will emboss whereever it is!
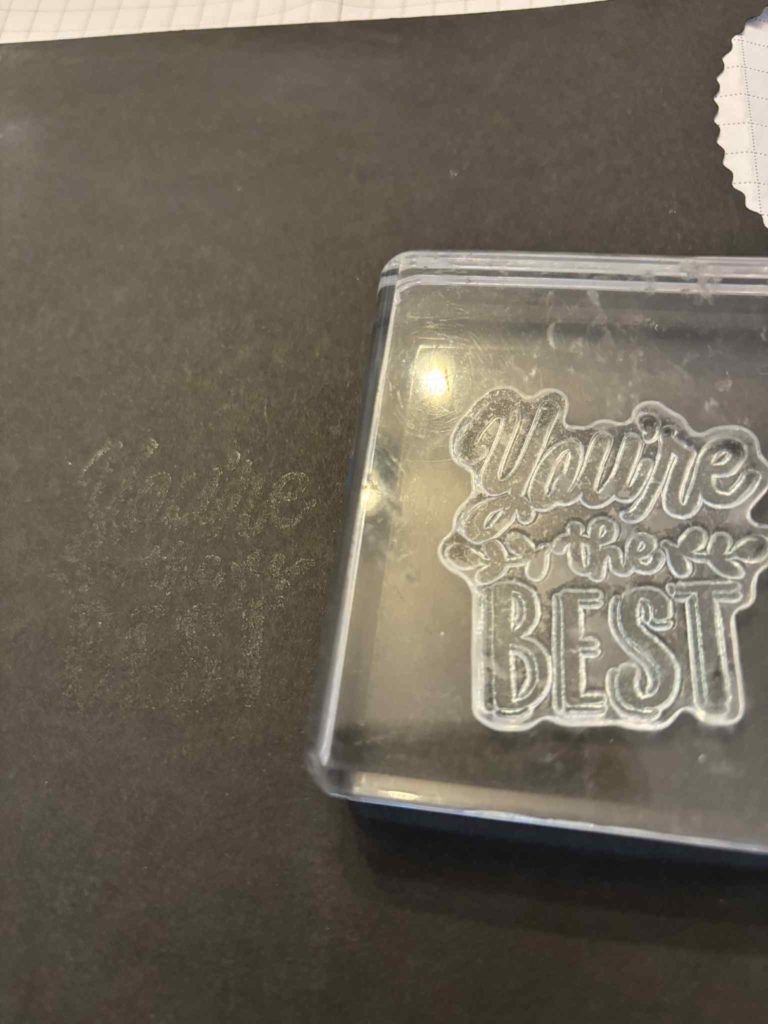
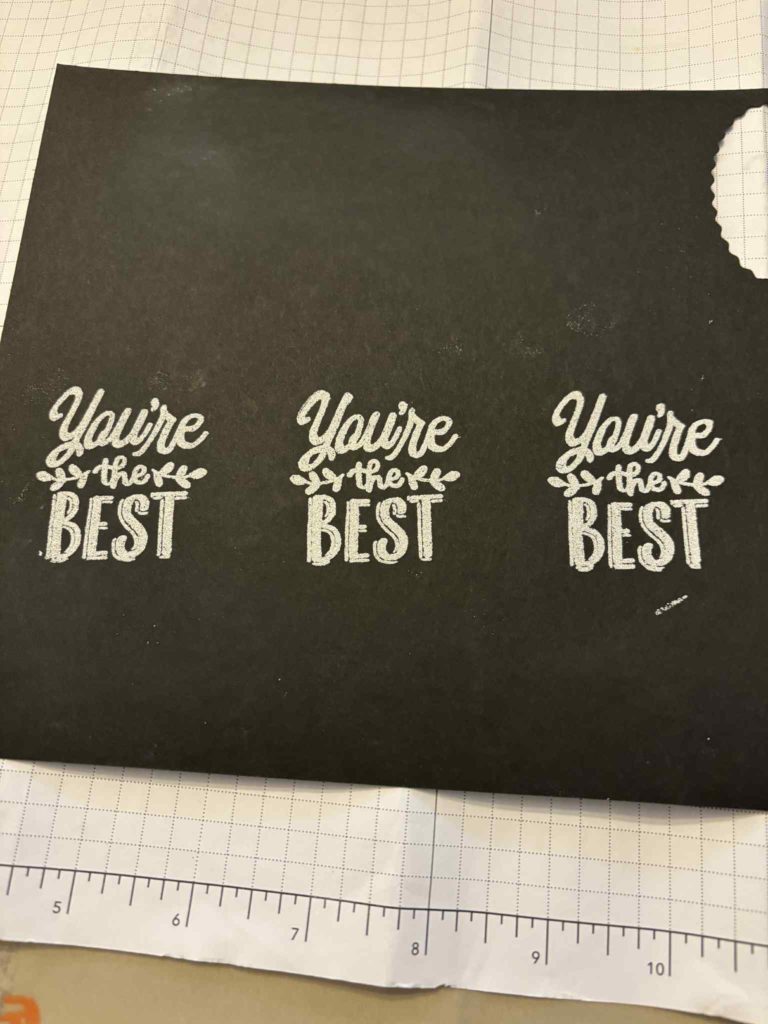
Allow the heat tool to warm up and gradually heat the embossing powder until it becomes glossy – I have included a photo to show the comparison.

Die cut the sentiment with the banner die from the Creative Haven die set. Cut a rectangle of white card 6cm x 9.5cm and mount the banner onto it. Using sharp scissors make a cut from the centre of the bottom edge towards the inside angle of the banner triangle. Cut from each corner towards the centre line cut to replicate the banner end on the mount. Put the mounted banner through the cut & emboss machine using the die to create a ribbon hole.


Arrange the stars onto the prepared card base. Add the ribbon to the sentiment banner. Once you are happy with placement, remove the adhesive backing from the big stars and stick them in place. Use Dimensionals to stick the banner in place. Stick the small stars in place. Use glue dots to hold the ribbon where you would like it to be placed.


The finished product is shown below.
![Basic Black A4 Card Stock [ 121688 ]](https://assets1.tamsnetwork.com/images/EC042017NF/121688s.jpg "Basic Black A4 Card Stock [ 121688 ]")
![Basic White A4 Cardstock [ 166781 ]](https://assets1.tamsnetwork.com/images/EC042017NF/166781s.jpg "Basic White A4 Cardstock [ 166781 ]")
![Creative Haven Bundle (English) [ 167209 ]](https://assets1.tamsnetwork.com/images/EC042017NF/167209s.jpg "Creative Haven Bundle (English) [ 167209 ]")
![Swirled Designs Bundle (English) [ 167311 ]](https://assets1.tamsnetwork.com/images/EC042017NF/167311s.jpg "Swirled Designs Bundle (English) [ 167311 ]")
![Secret Sea Classic Stampin' Pad [ 165285 ]](https://assets1.tamsnetwork.com/images/EC042017NF/165285s.jpg "Secret Sea Classic Stampin' Pad [ 165285 ]")
![Versamark Pad [ 102283 ]](https://assets1.tamsnetwork.com/images/EC042017NF/102283s.jpg "Versamark Pad [ 102283 ]")
![Heat Tool - Uk Plug [ 129054 ]](https://assets1.tamsnetwork.com/images/EC042017NF/129054s.jpg "Heat Tool - Uk Plug [ 129054 ]")
![Mini Corrugated 3 D Embossing Folder [ 165559 ]](https://assets1.tamsnetwork.com/images/EC042017NF/165559s.jpg "Mini Corrugated 3 D Embossing Folder [ 165559 ]")
![Black & White 1/4" (6.4 Mm) Gingham Ribbon [ 156485 ]](https://assets1.tamsnetwork.com/images/EC042017NF/156485s.jpg "Black & White 1/4\" (6.4 Mm) Gingham Ribbon [ 156485 ]")
![Mini Glue Dots [ 103683 ]](https://assets1.tamsnetwork.com/images/EC042017NF/103683s.jpg "Mini Glue Dots [ 103683 ]")
![Multipurpose Liquid Glue [ 154974 ]](https://assets1.tamsnetwork.com/images/EC042017NF/154974s.jpg "Multipurpose Liquid Glue [ 154974 ]")


Lovely card Angela.