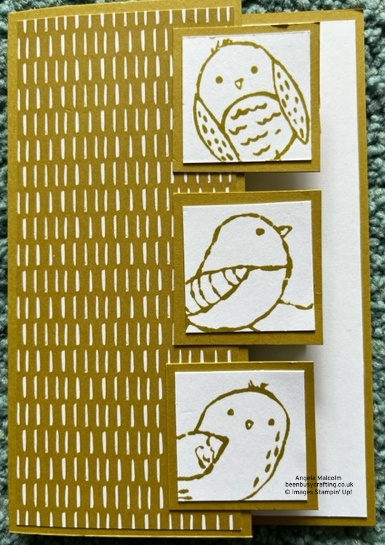
I want to share one of my favourite card styles with you. The reason I like it is that it can be changed to look completely different.

I used the Bird’s Eye View stamp set (161436) but you could use any one of your choice. The squares could be circles or a strip depending on the design on your stamp set.
Card Making Instructions
To make the card you need a card base in your chosen colour (Wild Wheat cardstock 161734) 14.8 x 10.5cm
A piece of basic white 14.3 x 10cm
A strip of Designer Series paper 14.3 x 6cm from the In colour 2023/24 In colour collection (161646)
3x 4 cm squares of Wild Wheat card. 3 x 3.5 cm squares basic white card
A strip of Basic White card (159228)
Classic Stampin’Pad Wild Wheat (161651)
Cut a 4cm strip off the right-hand side of the card base. (This can be used for the 3 squares)
Stick the DSP to front of the card using multi-purpose adhesive (154974) or Stampin’ Seal (152813)
Stamp your chosen images onto the basic white squares and mount them on the coloured squares once the ink has dried. Open the card flat with the patterned side up, use a ruler or grid paper to line up the squares so that they are 1/3 on the card and 2/3 past the edge. Fix in place with adhesive, making sure you only get adhesive on the 1/3 that is sticking on the card.
Turn the card over and stick the white panel onto the inside of the card. You can carefully add a greeting to the inside if you place it carefully. Alternatively you can add a basic white panel to the back so that your greeting can go on.
I hope you will give it a go and look forward to seeing your results…… send me the pics or post them on the Facebook page.


