
This month’s “Masculine” themed card project gives me an opportunity to use lovely products from the new Stampin’ Up! ® May to August mini catalogue.
We have been used to having a new “main” catalogue at this time but this year that isn’t going to happen. The reason is that the mini catalogues can accommodate changes more easily – we have seen shipping issues and supply issues that have made products unavailable but this change means that we won’t be getting frustrated trying to order items that are in a current catalogue. An example of this is the Stampin’ Snips. They were in the main catalogue last year but were unavailable for most of the year because the manufacturer was no longer able to supply them.
We also have lots of small production runs of Online Exclusives that are only available for a few months – still so much choice.
There will be 3 mini catalogues – January – April, May- August and September- December. Each catalogue will have at least a Suite and a Bundle that will remain current for a year.
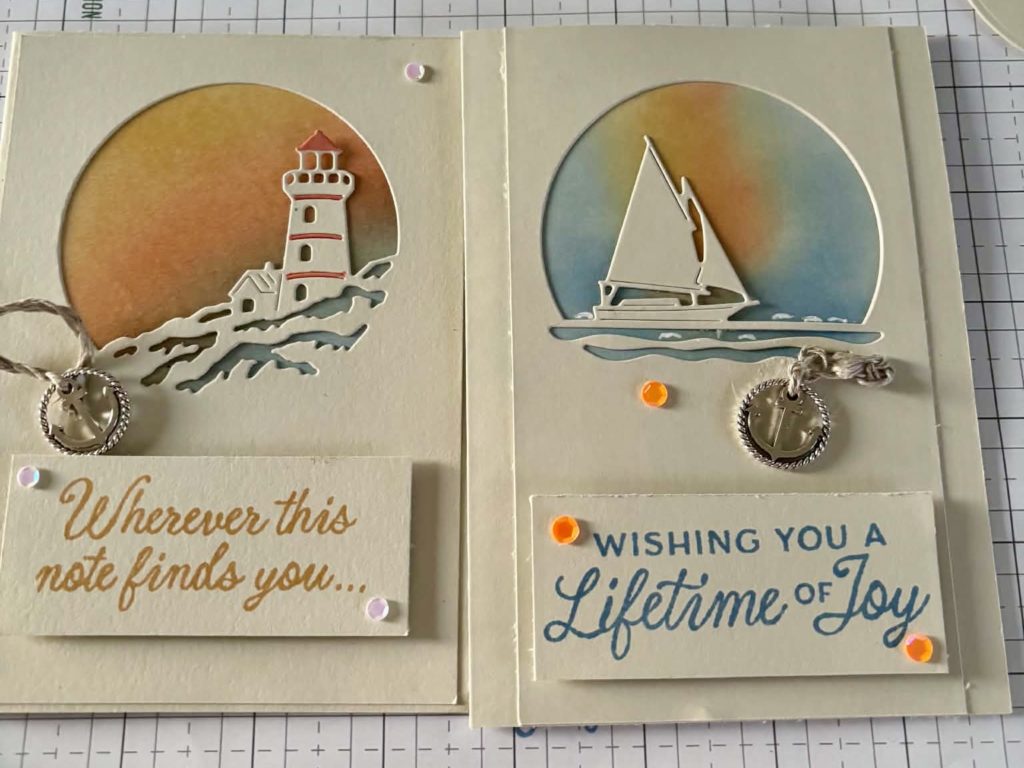
So….. let’s get to this month’s card on a Masculine theme. I chose the Sunset Coast bundle of stamps and dies to create the card. I created 2 versions because I wanted to use my Mini Cut and Emboss machine. One of my customers has pointed out that not everyone has the full size machine.
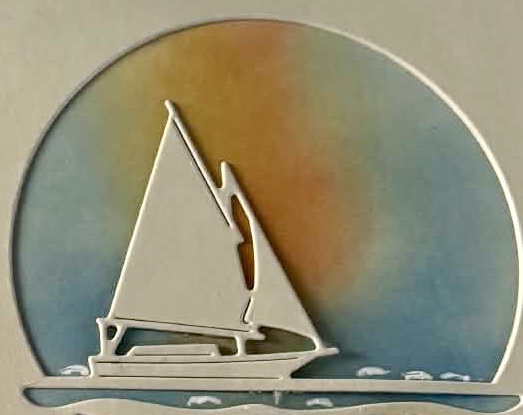
The dies have a lighthouse motif and a sailboat one. I chose Basic Beige card so that it allowed the background colours to stand out better behind the motif.
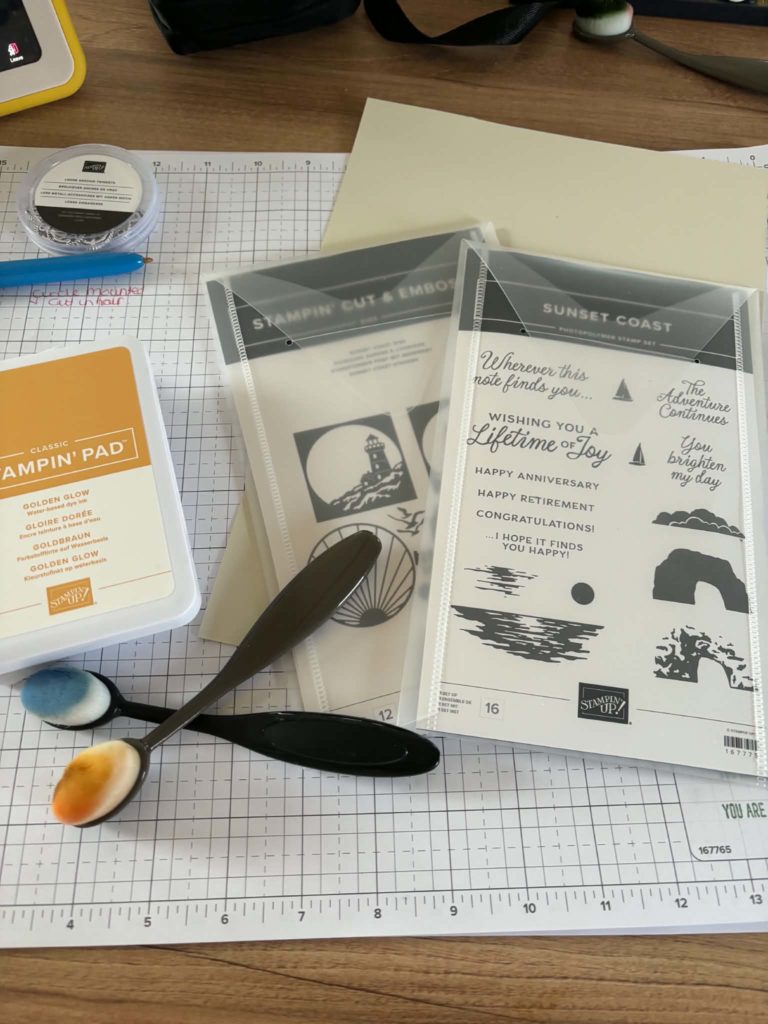
Start by getting everything together.
You need the:
- Sunset Coast Stamps and Dies
- 1 sheet Basic Beige Cardstock
- Blending brushes
- Ink pads in Golden Glow, Crisp Cantaloupe, Hydrangea Hue
- Embellishments
- Stampin’ Dimensionals
- Multi purpose adhesive and glue dots
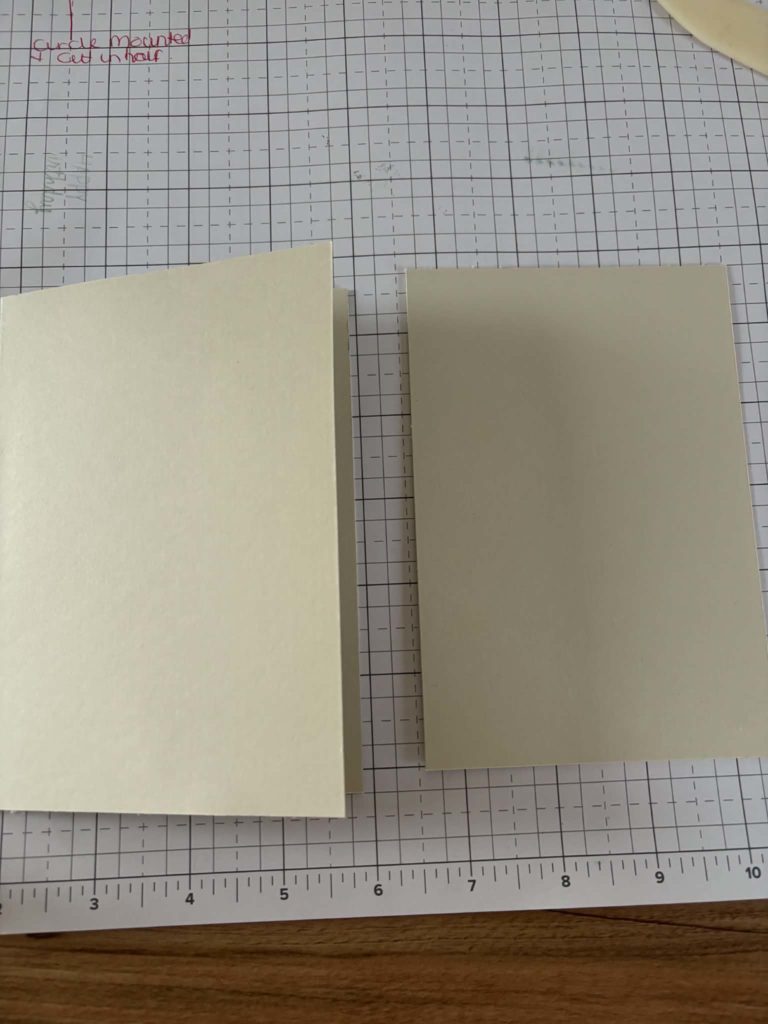
Score the A4 card at 10.5cm on short side, turn and cut at 14.8cm. Use bone folder and fold 1 of the pieces to form portrait card base.
Cut a piece from the remaining card measuring 8.5cm x 14.8cm, die cut your chosen design from the upper part of this paper piece.
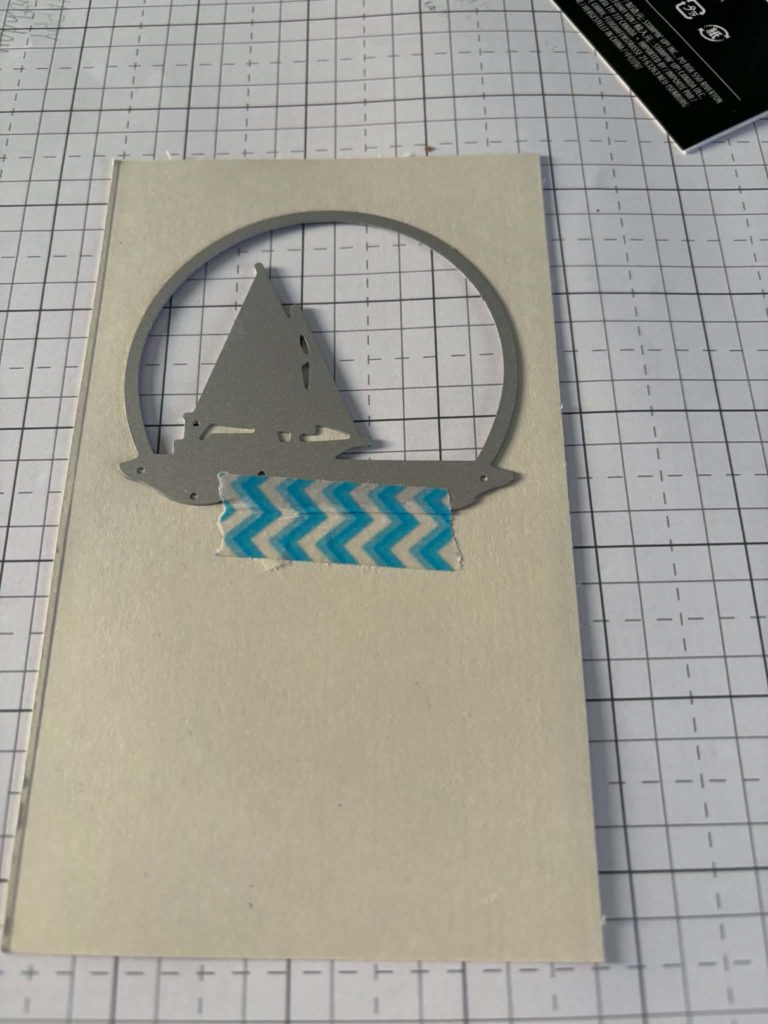
Place the die cut piece over the card front and make very light pencil marks to show where the die cut out is going to be.
The new ink pads allow you to squeeze the lid into the ink pad to pick up ink. The lid acts as a palette. Use a blending brush to pick up the ink. Check that you don’t have uneven coverage on your brush by gently blending circles onto a piece of scrap paper, if you are not getting enough ink, you can lightly use the brush on the ink pad. Don’t do this if the brush has been used first with any other colour. Once you are comfortable with your technique, start working on the area you have identified on your card front. Once you are happy with the blending, centre and stick the die cut top piece down with multi purpose adhesive.
Cut a piece of Basic Beige card 8cm x 3.5cm and stamp a greeting on the front. Stick on with Stampin’ Dimensionals.
Add your choice of embellishments.
You can see from the card on the left that I used a slightly bigger piece to die cut, it measures 10.5cm x 14.3cm.
The 2 completed cards are shown below.
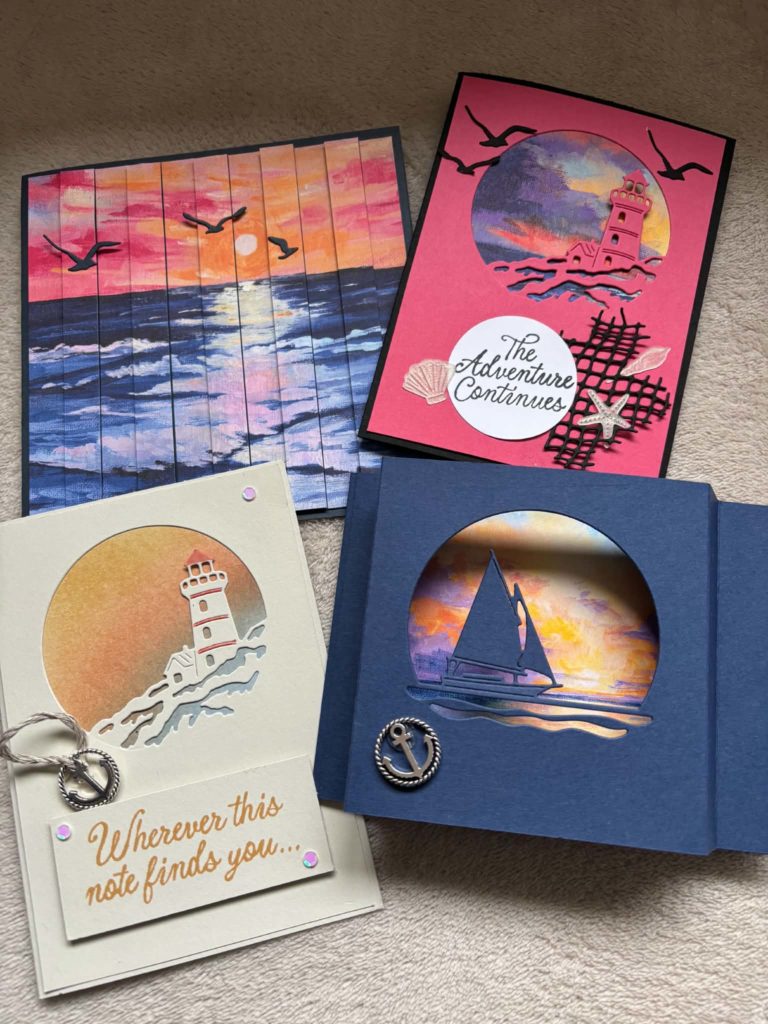
I have really enjoyed using the bundle and the accompanying papers are stunning. Here are a few other cards I have made. I will be using them for my next card class on Saturday 16th May.
![Basic Beige A4 Cardstock [ 164512 ]](https://assets1.tamsnetwork.com/images/EC042017NF/164512s.jpg "Basic Beige A4 Cardstock [ 164512 ]")
![Golden Glow Classic Stampin' Pad [ 167676 ]](https://assets1.tamsnetwork.com/images/EC042017NF/167676s.jpg "Golden Glow Classic Stampin' Pad [ 167676 ]")
![Crisp Cantaloupe Classic Stampin Pad [ 167680 ]](https://assets1.tamsnetwork.com/images/EC042017NF/167680s.jpg "Crisp Cantaloupe Classic Stampin Pad [ 167680 ]")
![Hydrangea Hue Classic Stampin' Pad [ 167677 ]](https://assets1.tamsnetwork.com/images/EC042017NF/167677s.jpg "Hydrangea Hue Classic Stampin' Pad [ 167677 ]")
![Small Blending Brushes [ 160518 ]](https://assets1.tamsnetwork.com/images/EC042017NF/160518s.jpg "Small Blending Brushes [ 160518 ]")
![Blending Brushes [ 153611 ]](https://assets1.tamsnetwork.com/images/EC042017NF/153611s.jpg "Blending Brushes [ 153611 ]")
![Sunset Coast Bundle (English) [ 167781 ]](https://assets1.tamsnetwork.com/images/EC042017NF/167781s.jpg "Sunset Coast Bundle (English) [ 167781 ]")
![Sunset Sparkle Sequins [ 167785 ]](https://assets1.tamsnetwork.com/images/EC042017NF/167785s.jpg "Sunset Sparkle Sequins [ 167785 ]")
![Loose Anchor Trinkets [ 167931 ]](https://assets1.tamsnetwork.com/images/EC042017NF/167931s.jpg "Loose Anchor Trinkets [ 167931 ]")
![Stampin' Dimensionals [ 104430 ]](https://assets1.tamsnetwork.com/images/EC042017NF/104430s.jpg "Stampin' Dimensionals [ 104430 ]")


Lovely card Angela
Great card, lovely blending.
Wonderful card, Angela! I really love the technique, the Designer Series Paper (DSP), and the bundle.